Resin Tutorial: Hand painted Spider epoxy resin Coaster

Unleash your creativity and make your own stunning and one-of-a-kind spider epoxy resin coaster with our step-by-step Resin Tutorial! This fun project is guaranteed to add a touch of spookiness to any room and make the perfect Halloween decoration.
Craft Supplies
For this project you will need the following craft supplies:
- epoxy resin
- Coaster Silicone Mold
- mixing cups
- mixing sticks
- alcohol ink: grape, purple and violet (or any 3 shades of purple)
- iridescent lilac glitter
- iridescent purple glitter
- iridescent white cellophane flakes
- spider stencil (optional)
- white acrylic paint
- black acrylic paint
- paint brush or silicone tools
- fine or medium tip black permanent marker
- iridescent cobweb confetii
- black spider confetti
- tiny black spider and cobweb confetti
Overview
We'll be casting the coaster into 4 layers. The first layer will consist of a purple resin mix which is poured into the outer edge of the coaster. The second layer will be clear and will serve as a base for hand painting the large spider. We'll then embed the confetti into the third layer of (clear) resin. Three shades of purple resin mixtures are then poured into the fourth and final layer.
A video showing how to make this project is also available:
Instructions
Step 1: Prepare and mix resin - follow instructions included with your resin for measuring and mixing.
Step 2: To your resin add grape alcohol ink, purple alcohol ink and iridescent lilac glitter. Mix well.

Step 3: Pour the resin mixture into the outer rim section of the coaster mold.
Step 4: Wait for the resin to cure.

Step 5: Prepare and mix resin.
Step 6: Pour a thin layer of the clear resin into the silicone mold.
Step 7: Wait for the resin to cure.

Note: For the next part we'll be painting a spider onto the resin. You can use stencils for painting on the large spider. Alternatively you can freehand paint it. The following steps apply whether you choose to use a stencil or not.
Step 8: Use white acrylic paint for drawing the spider's eyes.
Step 9: Wait for the paint to dry.
Step 10: Use a permanent marker to create an outline for the spider.

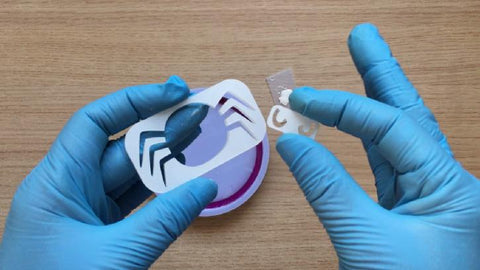
Step 11: Remove the stencil (if using one), and draw the spider using black acrylic paint.
Note: It's important to cover the marker lines with acrylic paint as the resin will eat at the marker paint and will destroy your painting. If you want to learn more about this, click here for more information.
Step 12: Wait for the paint to dry.

Step 13: Prepare and mix resin.
Step 14: Pour a thin layer of clear resin into the silicone mold.

Step 15: Embed the cobweb and spider confetti into the clear layer of resin.
Step 16: Wait for the resin to cure.

Step 17: Prepare and mix resin.
Step 18: Divide the resin into 3 mixing cups.
Step 19: Add purple alcohol ink and iridescent purple glitter to one of the cups.
Step 20: Add violet alcohol ink and iridescent white cellophane flakes to another cup.
Step 21: Add violet alcohol ink and iridescent lilac glitter to the remaining cup.
Step 22: Mix each cup well.

Step 23: Pour the resin mixtures into the mold. Fill the mold all the way through.

Step 24: Wait for the resin to cure.

Step 25: Remove the coaster from the silicone mold.

If you made this project I would love to see your creation - tag me on Instagram @thecraftsandglittershop if you'd like to share 🙂