How to make a nebula effect with resin
Share
Making your own nebula colored resin creations is very easy. In this article I go through the process giving a step by step explanation of how I made my pastel nebula bookmark and coaster set.
The supplies needed to make this project are as follows:
- Epoxy resin
- Coaster silicone mold
- Bookmark silicone mold
- Cream alcohol ink
- Violet alcohol ink
- Teal alcohol ink
- Sky alcohol ink
- Iridescent white glitter
- Iridescent blue glitter
- Holographic gold glitter
- Iridescent purple star confetti
- Iridescent blue star confetti
- Holographic gold star confetti
- Iridescent film (optional)

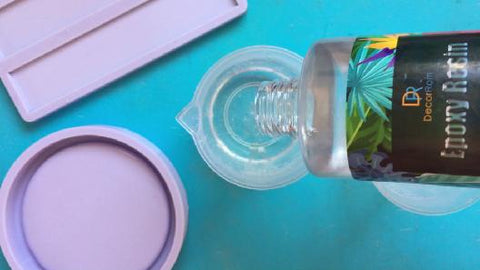
Start by preparing your resin. Mix the resin well for a minimum of 3 mins. You will know that the resin has been mixed properly when the cloudiness goes away.

Divide the resin equally into two cups.

To the first cup add: iridescent blue glitter, holographic gold glitter and iridescent blue hollow star confetti.

To the second cup add: iridescent white glitter, iridescent purple hollow star confetti, and holographic gold hollow star confetti.

For the dyes, add 10 drops to each cup of Cream alcohol ink. To the first cup then add 1 drop of Teal alcohol ink and 1 drop of Sky alcohol ink. To the second cup add 2 drops of Violet alcohol ink.
You can adjust the number of drops that you add to get the color shade of your linking, however make sure not to add too much ink into your resin as this might cause issues. For more information about this go to this article.
Mix each cup well to incorporate the dye equally. I usually mix each cup for around 2 minutes at this stage.

Prep your silicone molds by making sure that they are clean and free from lint or dust particles. A super easy way to clean your silicone molds is by using a piece of tape - it's magic!
At this stage feel free to add a few pieces of the iridescent film (if you wish to do so). Then start pouring the resin into the molds. Start by pouring 1 color and then the other color next.


You do not need to mix the colors to get a nice blend. The resin will flow and mix nicely on its own. Just make sure to add one color at a time and that your resin has a nice runny consistency.

Continue adding your resin into the molds in a pattern of your liking.

Once you have finished pouring your resin into the molds, you can (optionally) add a couple of more iridescent film pieces at this stage. Make sure to push them down gently using your mixing stick.

The next part is the hardest one - wait for the resin to fully cure 😁😁
Jokes aside, it truly is the hardest bit for me. I get so excited to the demold the resin and see the results.

Demold your coaster and bookmark when the resin has finished curing.


If you used shiny silicone molds like I did, your pastel nebula colored bookmark and coaster are complete. On the other hand, if your molds aren't shiny, or if you would like to add extra protection to your creations (from scratches) feel free to glaze them with a nice thick topcoat or by doming them with resin.

I hope that you have found this helpful and that it inspires you to make some lovely resin creations. You can use 3 colors or more if you'd like. The color combinations that you can use are endless.
If you're addicted to making bookmarks and coasters (like me 😅), these would make ideal gifts for your friends and family. They'll surely be more appreciated than anything store bought since they'll be especially made by you for them - and also tailored to their linking!

View the video here:
