DIY ❄ snowflake Christmas Ornaments

Craft Supplies
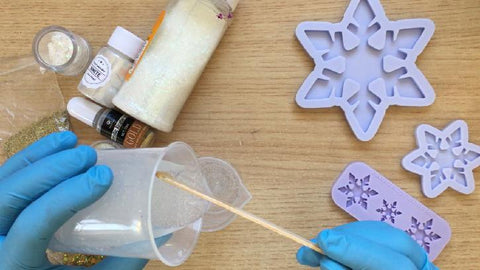
For this project you will need the following craft supplies:
- epoxy resin
- snowflakes silicone molds
- mixing cups
- mixing sticks
- gold resin pigment/alcohol ink
- iridescent white fine glitter
- iridescent white glitter strips
- iridescent solid white cellophane flake glitter
- iridescent white cellophane flake glitter
- pearl white mica pigment
- holographic gold fine glitter
- holographic gold glitter mix
- twine
A video showing how to make this project is also available:
Instructions
Step 1: Measure and mix epoxy resin. Make sure to follow the instructions provided with your resin.

Step 2: Divide the resin into 2 mixing cups.
Step 3: To one of the resin cups add gold resin pigment.

Step 4: To the other cup add small amounts of each glitter and white mica powder.

Step 5: Mix each cup well.

Step 6: Pour the resin mixtures into the silicone molds.


Step 7: Wait for the resin to cure.
Step 8: Remove the cured resin from the silicone molds.

Step 9: To turn the snowflakes into ornaments add twine. There are two options for adding the twine.
Option 1 is a no-drill method where you tie the twine to the snowflakes. This is the method I used and show in my photos and video.
Option 2 is to drill holes at the top of each snowflake, to which you will add an eye screw. Then add the twine to the eye screw.
