Beginner friendly: DIY 2 tone resin snowflakes
Craft Supplies
The craft supplies needed for this project are:
- epoxy resin
- snowflakes silicone mold
- mixing cups & sticks
- blue alcohol ink
- white alcohol ink
- holographic gold fine glitter
- iridescent white fine glitter
- iridescent white cellophane flakes glitter
- white acrylic paint
- paintbrush
Instructions
Step 1: Prepare and mix resin. Make sure to follow the instructions provided with your resin.
Step 2: Divide the resin into 2 mixing cups.

Step 3: To one cup add blue alcohol ink, white alcohol ink and holographic gold fine glitter.

Step 4: To the other cup add iridescent white fine glitter and iridescent white cellophane flakes glitter.
Step 5: Mix each cup well.

Step 6: Pour the clear glittery resin mixture first. Add small amounts into the mold as shown in the video. You can use your mixing stick to have better control on the amount poured into the mold.

Step 7: Fill the rest of the snowflakes using the blue resin mixture.
Step 8: Wait for the resin to fully cure.

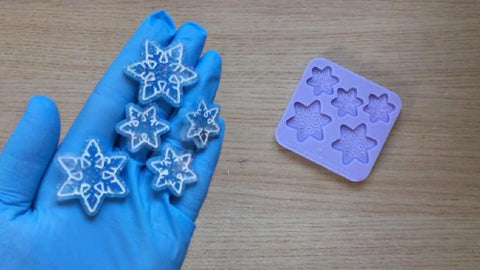
Step 9: Demold the snowflakes from the silicone mold.

Step 10: Paint the detail using a thin paintbrush and white acrylic paint.
Step 11: Wait for the paint to fully dry.
Step 12: Clean off the excess paint using rubbing alcohol or surgical spirit.
