Tutorial: Making wintery resin charms for winter decorations
It's so much fun, and also very easy, to make your own decorations for this upcoming winter and holiday season. Not to mention that you can customize them to your liking and they'll even be more treasured by you and your family.
If you want to learn how to make these charms, keep reading for a full step by step tutorial. A video tutorial is also available - you will find it linked at the end of this blog post.

Overview
As I've already said, these are very easy to make. They are ready in just two simple pours - the first pour is a clear layer and in this layer the snowflake embellishments are added, and then the second pour is the colored resin.
The supplies needed for this project are as follows:
- epoxy resin
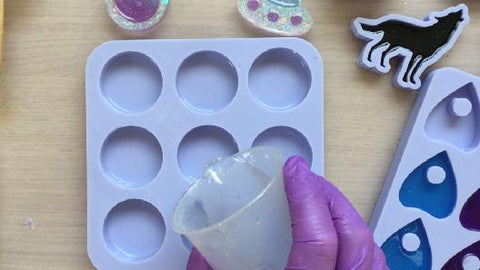
- 4 cm Circle Silicone Mold
- iridescent snowflake confetti in different shades - I used 5 different shades but you can use as many as you wish
- mixing cups and sticks
- light blue mica powder
- chunky blue glitter in 2 different shades
- alcohol ink: blue and white
- white pearl resin pigment
- iridescent glitter powder: white and blue
Instructions
Step 1: Start by gathering all of your supplies.
Step 2: Prepare a batch of clear resin - for now all you'll need is enough for a thin layer covering the surface of the mold.
Step 3: Pour the resin into the silicone mold - a thin layer in each cavity.
Step 4: Sprinkle the snowflake confetti onto the resin layer you have just poured and use a silicone tool to distribute them.
Note: When I was doing my charms. I submerged some of the snowflakes and left others at the top to help create a 3D effect in the finished resin pieces.
Step 5: Wait for the resin to harden.

Step 6: Once the first layer has hardened/cured, prepare another batch of resin. You will need enough to fill up the rest of the cavities.
Step 7: Divide the resin into 3 mixing cups.
Step 8: To the first cup add white pearl resin pigment and iridescent white glitter powder.
Step 9: To the second cup add white pearl resin pigment, white alcohol ink, blue mica powder and iridescent blue glitter powder.
Step 10: To the third mixing cup add white pearl resin pigment, white alcohol ink, blue alcohol ink and iridescent blue glitter powder.

Step 11: Mix each cup well and make sure to distribute the pigments equally and thoroughly in the resin to avoid having any issues with your resin curing.

Step 12: Sprinkle on some of the blue chunky glitter into some of the cavities.

Step 13: Pour the colored resin mixes into the silicone mold. I opted to use one single color in a particular cavity, but you can also mix colors and add more than one color in the same cavity - for my charms, I did 3 in each color.

Step 14: Once you have finished pouring in the colored resin mix and the cavities are full, wait for the resin to cure.

Step 15: As soon as the resin has finished curing, you can de-mold the resin pieces from the silicone mold.

The resin charms are complete - they're nice and shiny and they look so so magical. I am thinking of turning mine into baubles for the winter tree but I'm not sure yet. Let me know what you use yours for by leaving a comment down below. I would love to know!


Watch the video here:
1 comment
nice blog keep up the good work very informative
https://online.penkraft.in/ArtAttackHome