How to: DIY Stitch Resin Cabochons | Tutorial | Epoxy Resin & Silicone Mold
In this article I provide you with a step by step tutorial for creating your own Stitch resin cabochons/charms. If you are new to resin or if you're seeking inspiration for your next resin project, I'm sure that you will find this useful. At the end of the article you will find a link to the corresponding video tutorial.
You will also find this tutorial helpful if you are seeking to learn how to embed stickers into resin, or if you want to learn how to make two layer resin charms.
The supplies needed to make this project are:
- epoxy resin
- 4 cm Circle Silicone Mold
- measuring & mixing cups
- wooden stir sticks and a toothpick
- alcohol inks: Teal & Sky
- pearl resin pigment: Maya blue
- iridescent seashell confetti (optional)
- stickers

Step 1: Start by gathering all of your supplies and plan what stickers you will be using along with the colors (if you will be opting for different colors than those shown in this tutorial).
Step 2: Prepare your resin by mixing the two parts according to the instructions of the resin brand that you are using. For best results, measure the resin as accurately as possible.
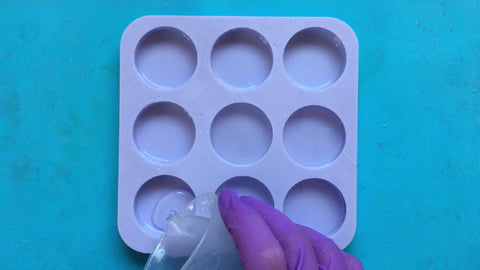
Step 3: Pour a thin layer of clear resin into your silicone mold.
Tip: A thin layer helps in managing the movement/floating of the stickers whilst the resin is curing.
Step 4: Add the stickers into the clear resin layer. Slide in the sticker at an angle to avoid air bubbles getting trapped in front of the sticker. Using a toothpick, then lightly push the sticker down to the bottom of the mold. Move the sticker around to help remove any trapped air bubbles at the front and then place it to your desired spot.
Tip: Apart from using a thin layer for embedding stickers, choosing the ideal time to add them also helps to avoid the stickers moving around during curing. That way they will need less monitoring.
Ideally you add the stickers in when the resin is at the stage of a thick syrup consistency. Then again don't wait too long. If the resin is too thick (gelish consistency), it's too late and adding the stickers in at this stage will cause a ton of bubbles in front and even around the sticker.

Keep an eye on the stickers until the resin has reached a gelish consistency. That way, if the stickers move around, you can use a toothpick to place the stickers back to their spot.
Step 5: Sprinkle in the seashell confetti if you opted to add them in your project. If not, skip this step.

Step 6: Wait for the first layer to cure before moving on to the next step - at least to a very solid gelish stage. Or you can wait until it's hardened to a smooth solid layer (usually the next day).
Tip: If you add in the second layer of resin before the first layer has sufficiently cured, the resin layers will mix and it will be a total mess. The stickers might also float and get covered by the colored resin.

Step 7: Prepare another batch of resin and divide it into two mixing cups.
Step 8: To the first cup add 4 drops of Sky alcohol ink and 5 drops of Maya Blue pearl pigment. Mix well.
Step 9: To the second cup add 5 drops of Teal alcohol ink, 3 drops of Sky alcohol ink and 3 drops of Maya Blue pearl pigment. Mix well.
Note: I am using 30ml mixing cups. Each cup has approximately 25ml of resin.


Step 10: Pour the colored resin into the silicone mold. To add more than one color in the same cavity, add a small amount of one color first to one side and then pour in the other color from another side. For a visual aid check out the video (linked below).
Repeat this until all of your cavities are full.

Step 11: Wait for the resin to fully cure. The amount of time you need to wait will vary from one resin brand to another - some will fully cure in 1 day and others will need 2 days to cure (even in the summer heat). If you are not sure on how long you need to wait, check the leftover resin in your mixing cup. If it's still bendy and soft, you should wait an extra day (assuming that you have mixed your resin correctly).
You can remove the resin from the mold when it's still bendy, but ideally you do wait for it to fully cure. That way you avoid getting dents or fingerprints onto your charms.
If your resin charms are still bendy after a few days you should troubleshoot the issue through this article.

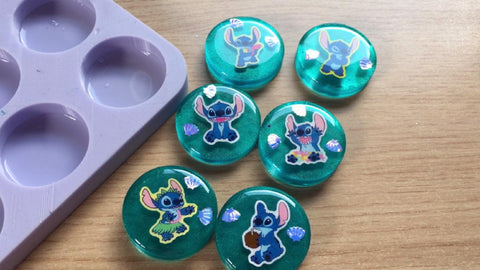
Step 12: Demold your charms from the silicone mold.

Step 13: Admire your finished resin charms.
I hope that you have found this tutorial helpful in learning a new technique, or maybe it helped inspire your next resin project!
Watch the video tutorial here: