Crafting a Summer Watermelon Coaster with Resin
Share

Hi! If you're new here, my name is Annaliza, and I run a small handmade business. I design and make silicone molds and enjoy resin crafting. This week, I'm excited to share my latest project: a Summer Watermelon Coaster! Earlier this year, I created a Spring coaster and this year I will be trying to make a new coaster for each season.
Project Overview
For my Summer coaster, I decided to create a watermelon design. I made a similar coaster last year, but I wanted to improve on it this time around. I'll be detailing the process and materials used, and you can find a comprehensive list of supplies and step-by-step instructions in this article.
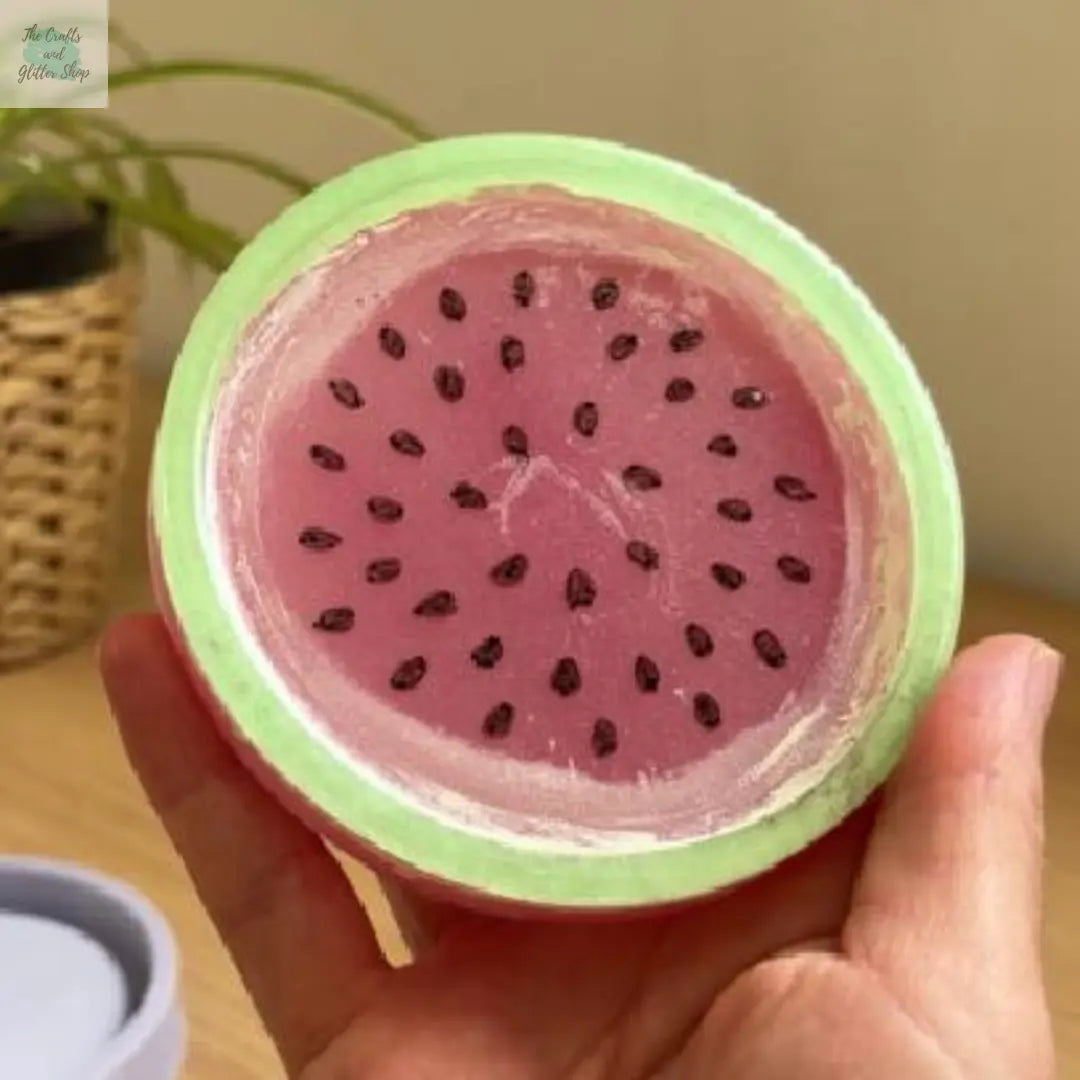
I started by pouring the outer rim of the coaster using a green resin mixture. As the resin began to harden, I painted the green part with white paint to ensure the color stands out.
To replicate the white section between the fruit and the rind, I applied mica powder to the outer area of the inner section. I wasn't entirely sure how this would turn out, but I decided to give it a try.
I poured a thin layer of clear resin, intending to paint the seeds on it. If you prefer a seedless watermelon coaster, you can skip this step and move on to the colored layer right away. Once the clear resin cured to a smooth state, I was ready to draw the seeds.
Using a black acrylic marker, I drew the seeds. I've tested these markers before, and they hold up well in resin compared to permanent markers. Alternatively, you can use acrylic paint, which provides a more solid result, while the marker offers a slightly translucent finish even after multiple layers. After letting the marker paint dry, I proceeded to pour the final resin layer.
I mixed a combination of colors to achieve the desired shade for the watermelon flesh. Initially, the color was too translucent, so I added a tiny bit of white mica powder to achieve the perfect hue. Once satisfied with the color, I poured the resin into the silicone mold and let it cure.
After the final layer cured, I was eager to see the results. While I loved the vibrant colors, I wasn't entirely satisfied with the white mica outline. It was a bit messier than I hoped, but since this coaster is for personal use, I'm content with the outcome. I can now switch my spring coaster for this new summer one, just in time for the beginning of the summer season!
Craft Supplies
For this project you will need the following craft supplies:
- epoxy resin
- mixing cups
- mixing sticks
- coaster silicone mold
- glitter green resin pigment
- white acrylic paint
- white mica pigment powder
- black acrylic marker
- snow white resin dye
- cherry red resin dye
- rose pink resin dye
Video
A video showing how to make this project is also available.
Instructions
Step 1: Prepare the Resin
- Mix the resin according to the manufacturer's instructions.
- Add green resin pigment and mix well.

Step 2: Create the Outer Rim
- Pour the green resin mixture into the outer rim section of the coaster mold.

- Allow the resin to start hardening, then paint the green part with white paint to make the color stand out.

Step 3: Add the White Section
- Apply mica powder to the outer area of the inner section to mimic the white section between the rind and the watermelon flesh.
- Remove excess paint to clean up the look.

Step 4: Pour Clear Resin Layer
- Mix and prepare your resin according to the manufacturer's instructions.
- Pour a thin layer of clear resin into the mold.
- Allow it to cure to a hardened smooth state.

Step 5: Draw the Seeds
- Use a black acrylic marker or acrylic paint to draw the watermelon seeds on the cured clear resin layer.
- Let the marker paint dry completely.


Step 6: Pour Final Colored Resin Layer
- Mix and prepare your resin according to the manufacturer's instructions.
- Add cherry red, rose pink and snow white resin dye to your resin.
- Mix the resin well.
- If the color is too translucent, add a small amount of white mica powder to achieve the right opacity.
- Pour the colored resin over the coaster and let it cure fully.


Step 7: Final Touches
Once the resin has cured, demold your coaster and enjoy your new summer-themed creation! If you encounter any issues or have questions during the process, feel free to reach out for assistance.
Happy crafting!

