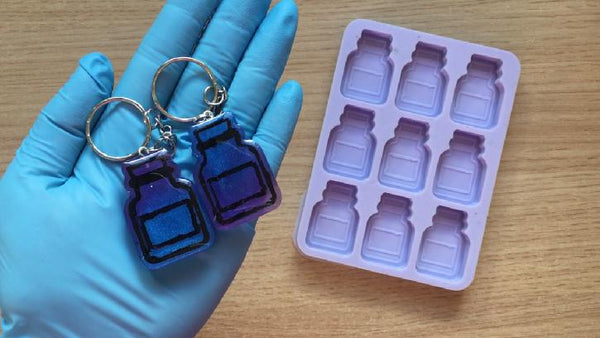
Resin Tutorial: Apothecary Jars Key Chain
Share

In this beginner friendly resin tutorial I will be going through a step by step process for creating apothecary jar key chains. I used purple and blue in this tutorial, however feel free to play around with different color schemes.
For this project you will need the following craft supplies:
- mixing cups
- mixing sticks
- epoxy resin
- apothecary jars silicone mold
- blue pearl resin pigment
- purple pearl resin pigment
- black acrylic paint
- eye screw
- jump ring
- key ring with chain
A video tutorial is available on my YouTube channel showing all the steps explained in this tutorial.
Instructions
Step 1: Prepare and mix resin as per manufacturer's instructions.
Step 2: Divide the resin into two mixing cups.
Step 3: To the first mixing cup add purple resin pigment.
Step 4: To the other mixing cup add blue resin pigment.

Step 5: Mix each cup well, making sure to thoroughly and evenly distribute the pigments.

Step 6: Pour the resin mixtures into the silicone mold.

Step 7: Wait for the resin to cure.

Step 8: Once the resin has fully cured, de-mold the resin from the mold.

Step 9: Paint the details using black acrylic paint.
Step 10: Wait for the paint to fully dry.

Step 11: Drill holes at the top of each bottle charm.

Step 12: Add the eye screw to each bottle.

Step 13: Attach the jump ring and key ring with chain to each eye screw.
Step 14: Prepare and mix a batch of clear resin as per manufacturer's instructions.
Step 15: Dome the bottle charms by pouring a small amount of resin on the surface. Using a stir stick, gently move the resin towards the edges to create an even layer. Make sure to work on a level surface.

Step 16: Wait for the doming layer to cure and then your key chains are complete.

