Halloween Resin Coaster Tutorial
Share
Supplies needed for these project are:
- 10 cm / 4 inch Circle Silicone Mold
- Epoxy resin
- Black acrylic paint
- White acrylic paint
- Cat confetti x1
- Bat confetti x2
- Orange resin dye
- Blueberry resin dye
Instructions

Start by pouring a small amount of clear resin into the silicone mold. Then wait for the resin to harden.

Paint the hill and tombstones using black acrylic paint. I like using the nail art silicone tools for painting on the details, however you can use whatever you have or prefer.
Wait for the paint to fully dry once done.

When the paint has finished drying, pour another clear layer of resin into your mold.

Add the cat and bat confetti to the uncured layer of resin. Then wait for the resin layer to harden.

Mix some black and white acrylic paint (or use gray if you have it) and paint a couple of clouds.
Wait for the paint to dry.

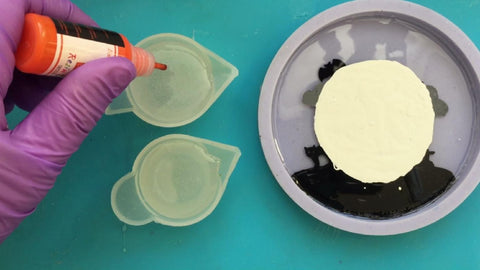
Using white acrylic paint, paint a full moon and wait for the paint to dry.
To add more depth, you can also pour another layer of resin here before painting the moon.

Divide your resin into two mixing cups. In one cup put 4 drops of Orange resin dye, and in the other cup put 5 drops of Blueberry resin dye. Mix the dye well until it is evenly distributed in the resin.

Pour the colored resin into the mold, the orange at the bottom and the blue at the top.
Wait for the resin to cure.

De-mold the resin from your mold.

Dome the coaster with resin and wait for it to cure.

Watch the video here
