
DIY snowglobe resin charm bezel from scratch
For this project I used the following supplies:
- Snow Globe Shaker Mold
- Epoxy resin
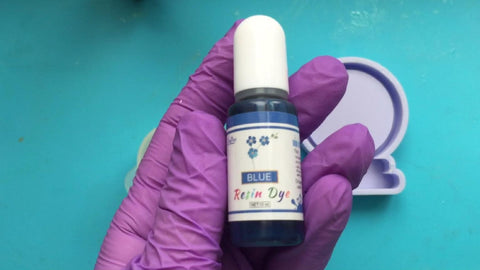
- Blue resin pigment
- Iridescent snowflake confetti
- Winter bunny sticker
- Iridescent hollow star confetti
- Very fine iridescent glitter
Instructions
Start by preparing a mix of epoxy resin. Always make sure to follow the instructions from the resin brand that you are using when mixing your resin.
Put in 2 drops of the Blue resin dye into your resin and mix it well until it is equally distributed.

Pour your resin into the silicone mold and leave it to cure.Then de-mold your resin bezel charm from the silicone mold.

Pour a small amount of resin into the middle part of your bezel. You only need a very thin layer for this part.

Then start adding in your snowflakes. In this case, we are only using the resin to stick on the snowflakes, so the thinner the resin layer, the better. This avoids having the snowflakes move around or float during the resin curing process.
Wait for the resin to harden before you proceed to the next step.
Tip: If you want to speed up the process, you can use UV resin for this step onward.

Once your resin layer has cured, stick on your winter bunny sticker. Make sure to press on the sticker well to remove any bubbles from underneath, and also to keep it from floating in the resin.

As soon as the sticker is in place, pour another thin layer of resin on top, and add in the iridescent star confetti. Another alternative is to add more snowflakes in addition to the stars, or even instead of the stars.
Then again wait for the resin to cure before you proceed to the next step.


You can keep adding more layers if you want to add more detail or dimension. For my charm, I decided to stop at 2 layers.
Prepare your resin and add a small amount of very fine iridescent white glitter for a snowy effect. Adding the glitter is optional - you can omit it if you wish to do so.
Pour the resin onto the bezel charm. Start by filling in the middle (if it's not already full), and then in the same step start adding small amounts of resin at a time to dome your charm.
Wait for the resin to cure.

At this point, I'm usually finished working on my charms, but in this case I had a mishap and the resin from the doming layer over-spilled to the back of the charm.

To solve this, I domed the back as well. I know this is something that many resin crafters do for all their charms, however it was an extra step for me as I usually don't dome the backs.

When the doming layer is cured, the resin charm is finished.

Watch the video